Generate a shape, then export STL
Image to STL: Move from a picture to a mesh you can examine
Turn a clear picture of one object into a 3D mesh free, with no sign-up. Rotate the result and download an STL to inspect in your slicer.
Create your model
3D preview
Sample result · TRELLIS
 Input image
A real TRELLIS example generated on Image to 3D AI. Inspect the shape, then create your own model from a supported input.
Use cases
Explore image to STL for your next physical idea
An image to STL workflow gives you a digital shape to inspect before physical production. Use it for early form studies and mesh editing, then complete the checks required by your printing process.
- TRELLIS
Use image to STL generation to explore the volume of a drawn character, creature or sculptural object. Turn the mesh to assess the silhouette and connected parts before taking it into a sculpting application. Delicate details and unsupported areas may need additional modeling before a physical version is practical.
- TRELLIS
An image to STL model can become the starting mesh for a decorative prototype. Inspect the shape in your editor or slicer and decide whether it needs repairs, thicker walls or a different orientation. Plan supports and production settings for the actual printer and material you intend to use.
- Tripo H3.1
An image to STL workflow can help you discuss the broad form of a product concept without modeling every surface by hand first. Use the generated mesh to compare proportions and visible parts. Precise dimensions, mating features and functional tolerances still need dedicated design work and independent validation.
- Rodin 2.5 Fast
Explain the difference between an object image and three-dimensional geometry by inspecting the generated mesh from several sides. The STL can be opened in a compatible application for a lesson about dimensions, surfaces and preparation. Review the file before deciding whether it is suitable for a classroom print.
Examples
Image to STL starts with a real three-dimensional shape
Explore actual meshes generated from pictures, text prompts and multiple views, with validated platform STL export. Colored previews show the model’s appearance; STL contains geometry without those colors or textures. Export validation does not certify a mesh as print-ready.
Input imageFeatures
Your image to STL workflow from input to exported geometry
Image to STL gives you a surface mesh you can assess before print preparation. The generated volume, the details modeled into that surface and the exported dimensions are separate things to judge.
Generate volume from the pictured object
Image to STL generation gives a flat reference an inferred volume. That makes it a starting point for a freestanding piece such as a desk ornament. A side or underside missing from the source is an interpretation. A shape that depends on exact measurements or hidden fittings still needs modeling work in a mesh editor.
 Input image

See how a silhouette changes with the angle
Front, side and back views of an image to STL result reveal different parts of the same volume. A rim can look substantial head-on but narrow from the side. The outline from behind can reveal where the cap meets the stem and how much of that join is visible. Those differences show where a shape may need further work.



Inspect geometry without relying on its color
A solid or wireframe view of an image to STL model shows what will travel with its triangle mesh. A painted groove stays part of the texture, while a modeled groove changes the surface and remains visible without color. This distinction matters for relief, lettering and trim you intend to carry into a physical piece.

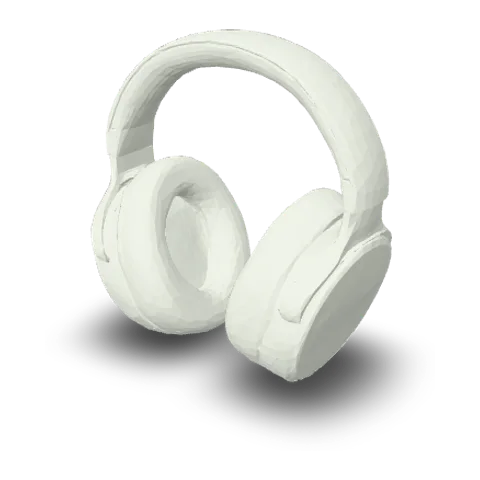
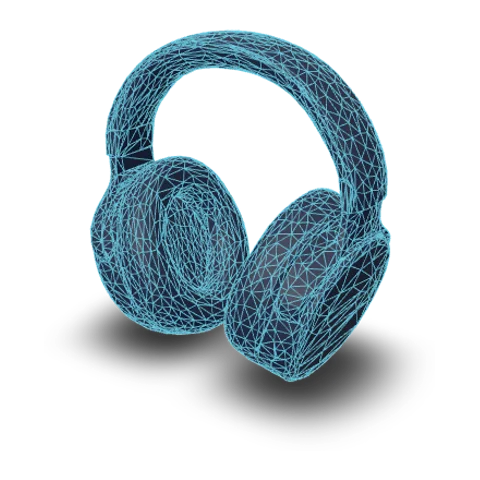
Export STL with a clear sizing starting point
The STL download stores the triangle mesh without textures. The current exporter makes the longest side 100 millimeters and uses Z as the up axis, giving you a defined starting size for further work. Because STL itself does not record a unit label, confirm the interpreted dimensions in your editor or slicer and resize as needed.
- glbWeb and games
- objEditing tools
- stl3D printing
How it works
How image to STL generation works from reference to print preparation
Follow the image to STL process from one clear reference through a generated volume to a file you can inspect in your own editing or slicing software.
- Upload an object picture
Upload a clear view of your subject
Start the image to STL workflow with a picture that shows one recognizable object. Keep its main outline visible and check the displayed file requirements. Select a model that supports your chosen input, or switch to Multi-Image when you have consistent views of the same subject.
- TRELLISFREE
- Rodin 2.5 FastPRO
- Hunyuan 3D 3.1 RapidPRO
- Tripo H3.1PRO
- Hunyuan 3D 3.1 ProPRO
- Rodin 2.5PRO
- Meshy 7.1PRO
Generate and inspect the three-dimensional form
Review the model options and credit quote before pressing Generate. Rotate the image to STL result to inspect its sides, back and underside. A solid or wireframe preview helps you judge the geometry separately from the colored surface shown in a textured view.
- STLGLBOBJ
Download STL and check print preparation
Keep STL selected when you download the mesh. Open it in your editor or slicer, verify the units and intended dimensions, and examine geometry, wall thickness and supports. Complete any repairs or design changes required for the actual printing process before starting a physical print.
More generators
More AI 3D generators
Alongside image to STL, explore textured-model formats, other ways to supply a reference and the available model pages before deciding how to continue your design.
Stories
Image to Stl Stories
Read how creators used image to STL for figurines and decorative studies, separating the visible texture from geometry before reviewing the exported shape.
I tried image to STL with the little devil reference, then looked at the exported shape without its purple color. The horns and feet were easier to assess as geometry. I kept the mesh with my miniature study notes and checked the overall proportions before moving on to any separate sizing or print-preparation work.
FAQ
Image to STL questions
Answers about the shape an image to STL converter generates, what its download contains and which checks belong in your printing workflow.
- AI-generated geometry
- STL · OBJ · GLB
- Check before printing
This image to STL workspace generates a three-dimensional mesh from the object in your picture and exports its geometry as STL. Download the file for inspection and preparation in your own tools; the generated model is not automatically certified for printing.
Start an image to STL project with the object in your picture
Upload a clear reference, generate an image to STL model and inspect its geometry from every side. Download the mesh, check its dimensions and continue the preparation your editor, slicer and printing process require.